User:Shakes
About
Chief of the Aesthetics Council and Aesthetics manager of the ![]() /fgog/ team.
/fgog/ team.
Feel free to contact me if you need any kind of help regarding 4cc/VGL aesthetics (check the talkpage).
Quick tutorial for previewing kits in blender
Prerequisites
Blender: Download
sxsxsx Blender kit previews: Here
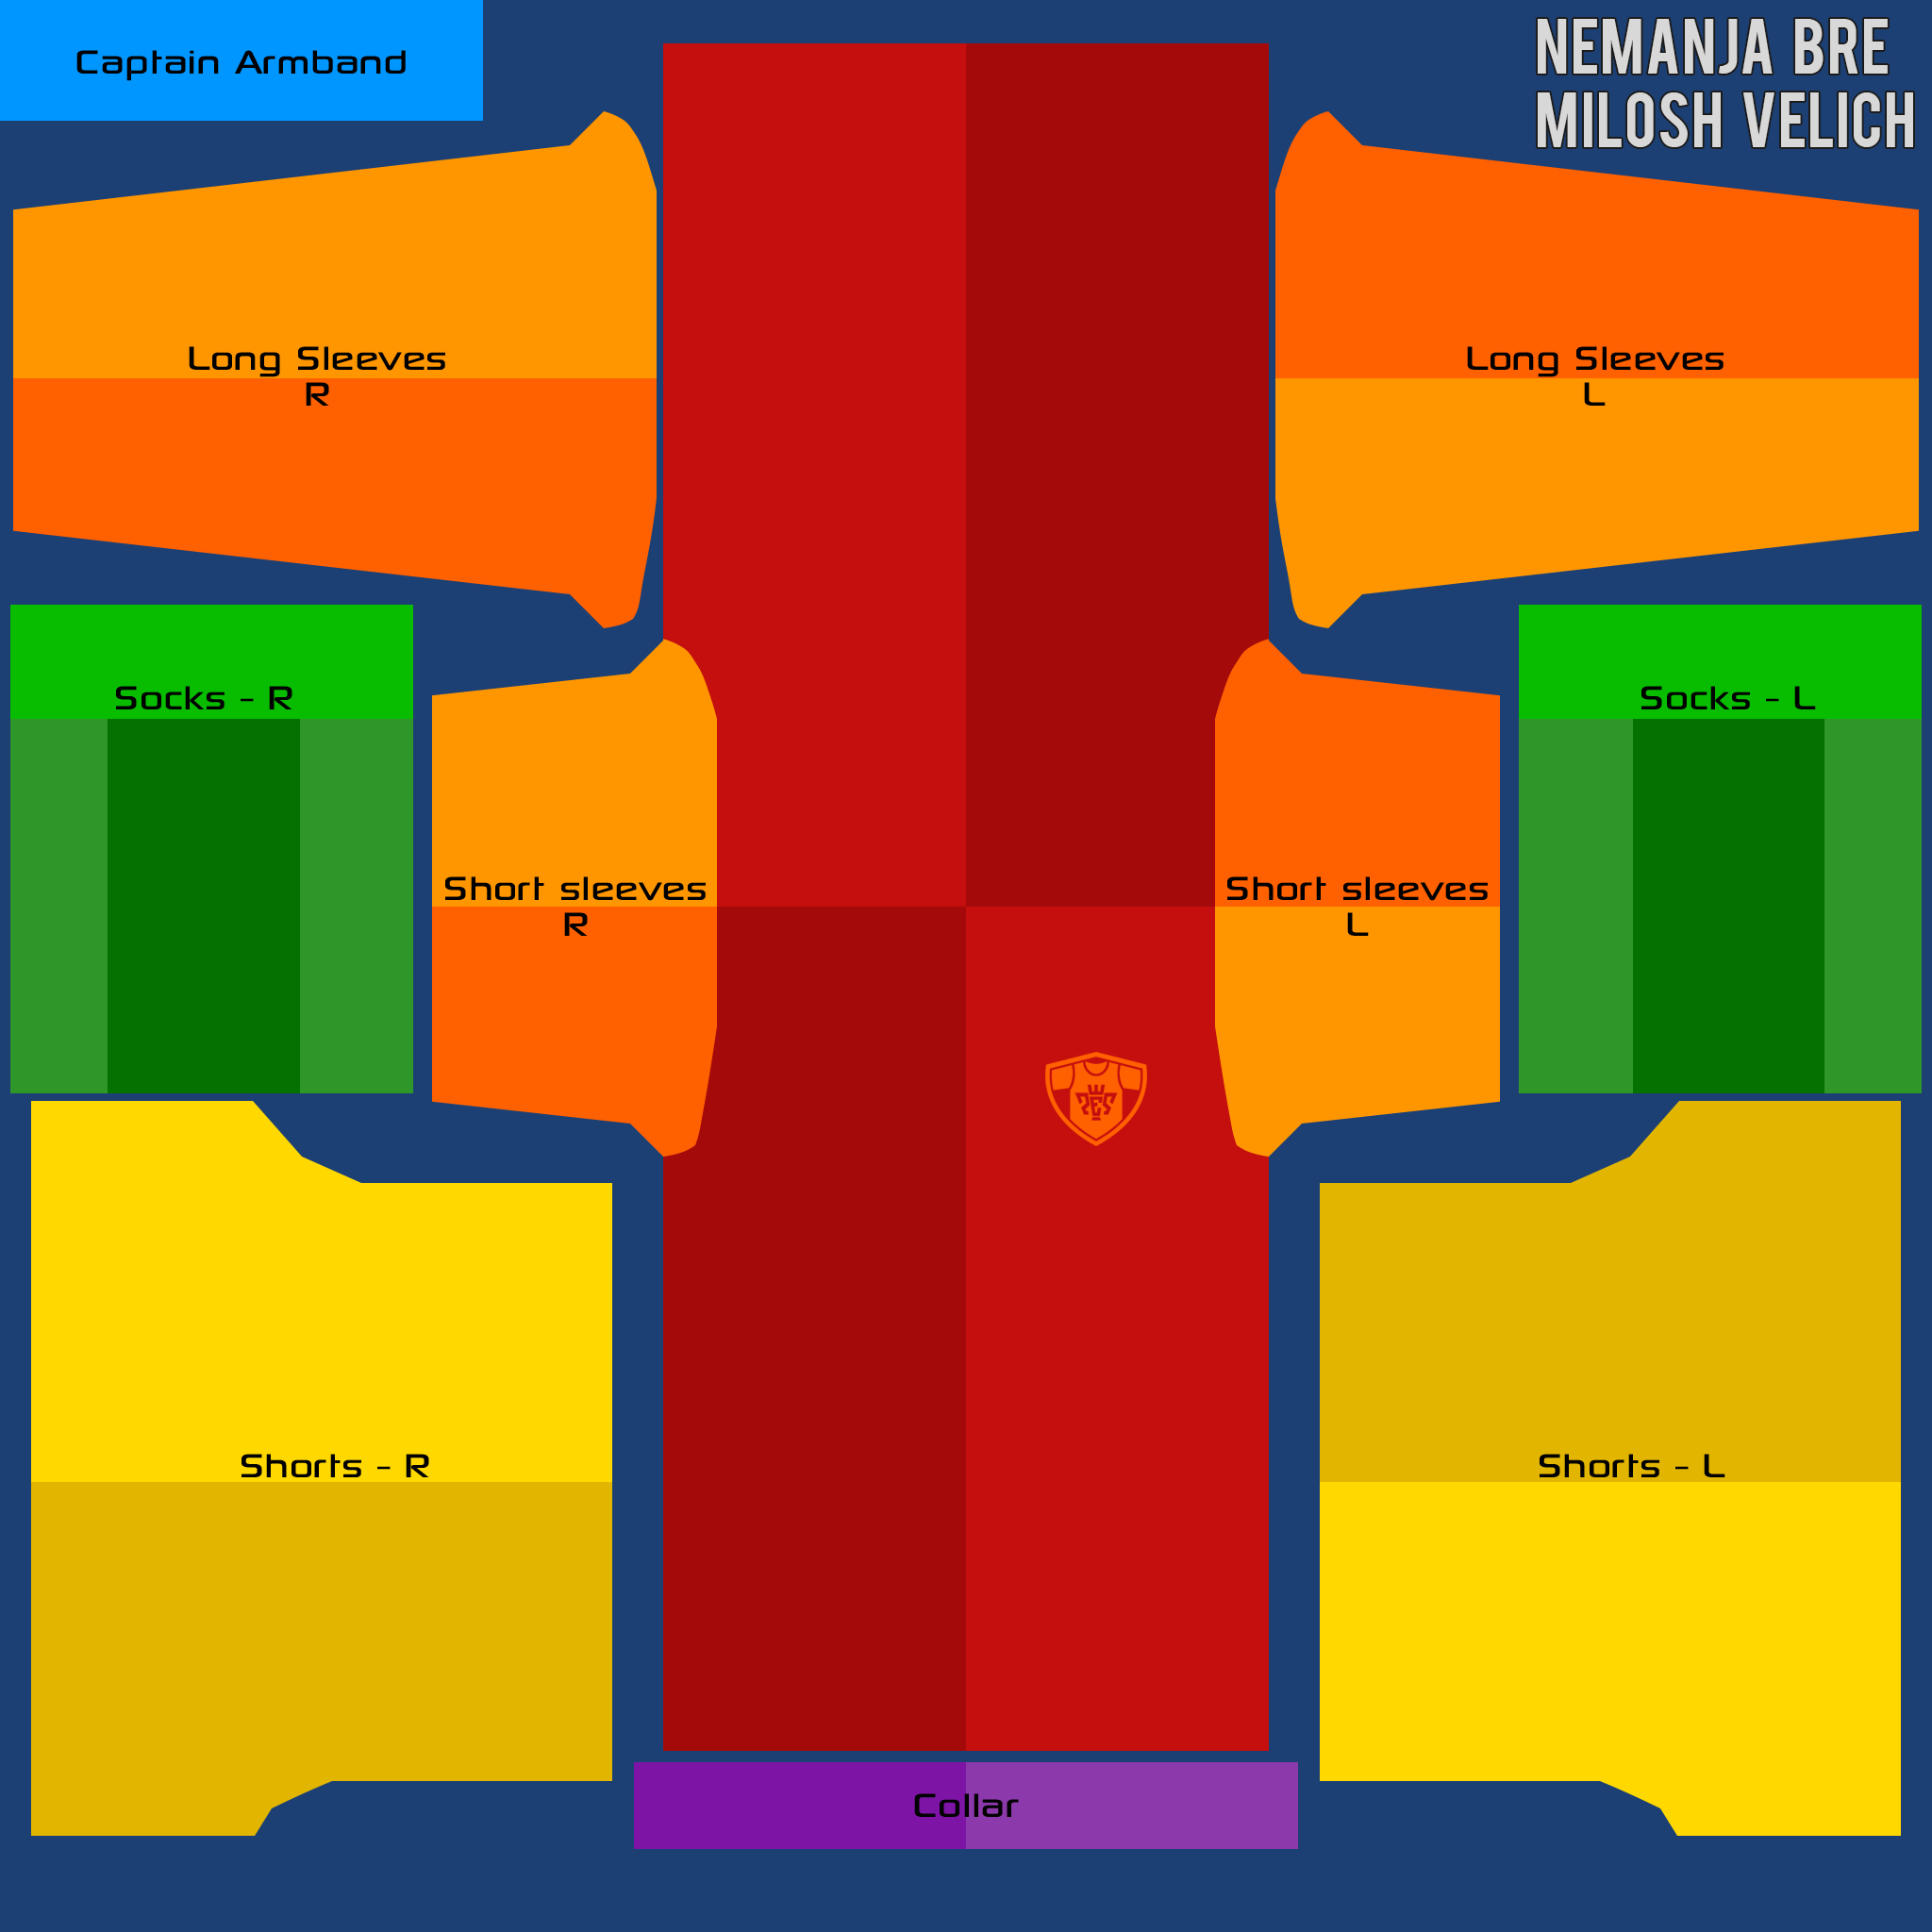
A standard kit template: Here
What to do
- Download and install blender
- Extract the blender kit previews zip and double click on the .blender file
- Look at the jpg image included in the zip to find out what's the button you should press to load a kit file. You may have to scroll down a bit on that bottom right window until the button shows up.
- Click on it and open the template kit png. Now you're set, move around the model on the left to learn how every part in the kit file is used.
- You can now edit the template file with your favorite image editor, save the changes, and use the refresh button to the right of the loading button to instantly see the result of the changes you made.
How to move the preview model
- Hold the middle mouse button: Rotates the model
- Scroll with the mouse wheel: Zooms the model
- Hold Shift and the middle mouse button: Pans the model
Tips
If you want to load the kit file in the middle window for a side by side comparison, press Alt-O while your mouse cursor is over that window and load the same file as before. The commands listed above work in that window too. Use Alt-R if you want to refresh the image after you've made changes to it.
When you've finished editing the texture file remember to save it in dds format as indicated in the Kits page, but always keep a png copy in case you want to make further edits to it, since the dds format makes the image lose quality every time it's saved.
You can see the different shirt, sleeves, collar, etc types by clicking on the eye icons on the layers in the top right window, to hide them or show them.