Difference between revisions of "/c/ Roster"
Jump to navigation
Jump to search
(Updating the Player Data section; the other bit will wait until we're done messing about with Yuno on the team (which will be when the cup happens)) |
(Putting the player data section up to date) |
||
| Line 13: | Line 13: | ||
| style="border-style: solid; border-width: 1px"| GK | | style="border-style: solid; border-width: 1px"| GK | ||
| style="border-style: solid; border-width: 1px"| Ika-chan | | style="border-style: solid; border-width: 1px"| Ika-chan | ||
| style="border-style: solid; border-width: 1px"| | | style="border-style: solid; border-width: 1px"| 186 cm / 125 kg / L | ||
| style="border-style: solid; border-width: 1px"| - | | style="border-style: solid; border-width: 1px"| - | ||
| style="border-style: solid; border-width: 1px"| | | style="border-style: solid; border-width: 1px"| - | ||
| style="border-style: solid; border-width: 1px"| | | style="border-style: solid; border-width: 1px"| 87 | ||
|- | |- | ||
| style="border-style: solid; border-width: 1px"| LB | | style="border-style: solid; border-width: 1px"| LB | ||
| style="border-style: solid; border-width: 1px"| Hanako Ikezawa | | style="border-style: solid; border-width: 1px"| Hanako Ikezawa | ||
| style="border-style: solid; border-width: 1px"| | | style="border-style: solid; border-width: 1px"| 185 cm / 52 kg / L | ||
| style="border-style: solid; border-width: 1px"| - | | style="border-style: solid; border-width: 1px"| - | ||
| style="border-style: solid; border-width: 1px"| P06 | |||
| style="border-style: solid; border-width: 1px"| 98 | | style="border-style: solid; border-width: 1px"| 98 | ||
|- | |- | ||
| style="border-style: solid; border-width: 1px"| CB | | style="border-style: solid; border-width: 1px"| CB | ||
| style="border-style: solid; border-width: 1px"| Haruhi Suzumiya | | style="border-style: solid; border-width: 1px"| Haruhi Suzumiya | ||
| style="border-style: solid; border-width: 1px"| 195 cm / | | style="border-style: solid; border-width: 1px"| 195 cm / 44 kg / L | ||
| style="border-style: solid; border-width: 1px"| | | style="border-style: solid; border-width: 1px"| - | ||
| style="border-style: solid; border-width: 1px"| - | | style="border-style: solid; border-width: 1px"| - | ||
| style="border-style: solid; border-width: 1px"| 101 | | style="border-style: solid; border-width: 1px"| 101 | ||
|- | |- | ||
| style="border-style: solid; border-width: 1px"| CB | | style="border-style: solid; border-width: 1px"| CB | ||
| style="border-style: solid; border-width: 1px"| | | style="border-style: solid; border-width: 1px"| Maka Albarn | ||
| style="border-style: solid; border-width: 1px"| | | style="border-style: solid; border-width: 1px"| 200 cm / 55 kg / R | ||
| style="border-style: solid; border-width: 1px"| | | style="border-style: solid; border-width: 1px"| - | ||
| style="border-style: solid; border-width: 1px"| - | | style="border-style: solid; border-width: 1px"| - | ||
| style="border-style: solid; border-width: 1px"| | | style="border-style: solid; border-width: 1px"| 91 | ||
|- | |- | ||
| style="border-style: solid; border-width: 1px"| RB | | style="border-style: solid; border-width: 1px"| RB | ||
| style="border-style: solid; border-width: 1px"| Kyouko Toshinou | | style="border-style: solid; border-width: 1px"| Kyouko Toshinou | ||
| style="border-style: solid; border-width: 1px"| | | style="border-style: solid; border-width: 1px"| 185 cm / 45 kg / R | ||
| style="border-style: solid; border-width: 1px"| - | | style="border-style: solid; border-width: 1px"| - | ||
| style="border-style: solid; border-width: 1px"| P06 | |||
| style="border-style: solid; border-width: 1px"| 87 | | style="border-style: solid; border-width: 1px"| 87 | ||
|- | |||
| style="border-style: solid; border-width: 1px"| DMF | |||
| style="border-style: solid; border-width: 1px"| Konata Izumi | |||
| style="border-style: solid; border-width: 1px"| 180 cm / 40 kg / L | |||
| style="border-style: solid; border-width: 1px"| - | |||
| style="border-style: solid; border-width: 1px"| - | |||
| style="border-style: solid; border-width: 1px"| 85, 30 | |||
|- | |- | ||
| style="border-style: solid; border-width: 1px"| DMF | | style="border-style: solid; border-width: 1px"| DMF | ||
| style="border-style: solid; border-width: 1px"| Miku Hatsune | | style="border-style: solid; border-width: 1px"| Miku Hatsune | ||
| style="border-style: solid; border-width: 1px"| | | style="border-style: solid; border-width: 1px"| 185 cm / 42 kg / R | ||
| style="border-style: solid; border-width: 1px"| | | style="border-style: solid; border-width: 1px"| - | ||
| style="border-style: solid; border-width: 1px"| | | style="border-style: solid; border-width: 1px"| - | ||
| style="border-style: solid; border-width: 1px"| 86, 59 | | style="border-style: solid; border-width: 1px"| 86, 59 | ||
|- | |- | ||
| style="border-style: solid; border-width: 1px"| | | style="border-style: solid; border-width: 1px"| LMF | ||
| style="border-style: solid; border-width: 1px"| | | style="border-style: solid; border-width: 1px"| Yotsuba Koiwai | ||
| style="border-style: solid; border-width: 1px"| | | style="border-style: solid; border-width: 1px"| 170 cm / 30 kg / L | ||
| style="border-style: solid; border-width: 1px"| | | style="border-style: solid; border-width: 1px"| Box to Box | ||
| style="border-style: solid; border-width: 1px"| P05 | | style="border-style: solid; border-width: 1px"| P04, P05, S12 | ||
| style="border-style: solid; border-width: 1px"| | | style="border-style: solid; border-width: 1px"| 50, 83 | ||
|- | |||
| style="border-style: solid; border-width: 1px"| RMF | |||
| style="border-style: solid; border-width: 1px"| Kirino Kousaka | |||
| style="border-style: solid; border-width: 1px"| 170 cm / 45 kg / R | |||
| style="border-style: solid; border-width: 1px"| Hole Player | |||
| style="border-style: solid; border-width: 1px"| P04, P05, S12 | |||
| style="border-style: solid; border-width: 1px"| 80, 86 | |||
|- | |- | ||
| style="border-style: solid; border-width: 1px"| | | style="border-style: solid; border-width: 1px"| SS | ||
| style="border-style: solid; border-width: 1px"| Yui Hirasawa | | style="border-style: solid; border-width: 1px"| Yui Hirasawa | ||
| style="border-style: solid; border-width: 1px"| | | style="border-style: solid; border-width: 1px"| 167 cm / 50 kg / R | ||
| style="border-style: solid; border-width: 1px"| | | style="border-style: solid; border-width: 1px"| Dummy Runner | ||
| style="border-style: solid; border-width: 1px"| | | style="border-style: solid; border-width: 1px"| P03, S02, S05, S10, S19 | ||
| style="border-style: solid; border-width: 1px"| 81, 81 | | style="border-style: solid; border-width: 1px"| 81, 81 | ||
|- | |- | ||
| style="border-style: solid; border-width: 1px"| SS | | style="border-style: solid; border-width: 1px"| SS | ||
| style="border-style: solid; border-width: 1px"| Sayaka Miki | | style="border-style: solid; border-width: 1px"| Sayaka Miki | ||
| style="border-style: solid; border-width: 1px"| | | style="border-style: solid; border-width: 1px"| 192 cm / 50 kg / L | ||
| style="border-style: solid; border-width: 1px"| Creative Playmaker | | style="border-style: solid; border-width: 1px"| Creative Playmaker | ||
| style="border-style: solid; border-width: 1px"| | | style="border-style: solid; border-width: 1px"| P07, S06, S07, S09 | ||
| style="border-style: solid; border-width: 1px"| 87, 101 | | style="border-style: solid; border-width: 1px"| 87, 101 | ||
|- | |- | ||
| style="border-style: solid; border-width: 1px"| GK | | style="border-style: solid; border-width: 1px"| GK | ||
| style="border-style: solid; border-width: 1px"| Miho Nishizumi | | style="border-style: solid; border-width: 1px"| Miho Nishizumi | ||
| style="border-style: solid; border-width: 1px"| 180 cm / | | style="border-style: solid; border-width: 1px"| 180 cm / 50 kg / L | ||
| style="border-style: solid; border-width: 1px"| - | | style="border-style: solid; border-width: 1px"| - | ||
| style="border-style: solid; border-width: 1px"| - | | style="border-style: solid; border-width: 1px"| - | ||
| style="border-style: solid; border-width: 1px"| 73 | | style="border-style: solid; border-width: 1px"| 73 | ||
|- | |- | ||
| style="border-style: solid; border-width: 1px"| LB | | style="border-style: solid; border-width: 1px"| LB | ||
| style="border-style: solid; border-width: 1px"| Saber | | style="border-style: solid; border-width: 1px"| Saber | ||
| style="border-style: solid; border-width: 1px"| | | style="border-style: solid; border-width: 1px"| 182 cm / 42 kg / L | ||
| style="border-style: solid; border-width: 1px"| - | | style="border-style: solid; border-width: 1px"| - | ||
| style="border-style: solid; border-width: 1px"| P06 | |||
| style="border-style: solid; border-width: 1px"| 59 | | style="border-style: solid; border-width: 1px"| 59 | ||
|- | |- | ||
| style="border-style: solid; border-width: 1px"| LB | | style="border-style: solid; border-width: 1px"| LB | ||
| style="border-style: solid; border-width: 1px"| Yukko Aioi | | style="border-style: solid; border-width: 1px"| Yukko Aioi | ||
| style="border-style: solid; border-width: 1px"| | | style="border-style: solid; border-width: 1px"| 182 cm / 45 kg / L | ||
| style="border-style: solid; border-width: 1px"| | | style="border-style: solid; border-width: 1px"| Defensive Full-back | ||
| style="border-style: solid; border-width: 1px"| - | | style="border-style: solid; border-width: 1px"| - | ||
| style="border-style: solid; border-width: 1px"| 50 | | style="border-style: solid; border-width: 1px"| 50 | ||
| Line 118: | Line 111: | ||
| style="border-style: solid; border-width: 1px"| CB | | style="border-style: solid; border-width: 1px"| CB | ||
| style="border-style: solid; border-width: 1px"| Yuno | | style="border-style: solid; border-width: 1px"| Yuno | ||
| style="border-style: solid; border-width: 1px"| | | style="border-style: solid; border-width: 1px"| 187 cm / 40 kg / L | ||
| style="border-style: solid; border-width: 1px"| | | style="border-style: solid; border-width: 1px"| - | ||
| style="border-style: solid; border-width: 1px"| - | | style="border-style: solid; border-width: 1px"| - | ||
| style="border-style: solid; border-width: 1px"| 30 | | style="border-style: solid; border-width: 1px"| 30 | ||
|- | |- | ||
| style="border-style: solid; border-width: 1px"| CB | | style="border-style: solid; border-width: 1px"| CB | ||
| style="border-style: solid; border-width: 1px"| | | style="border-style: solid; border-width: 1px"| Mikasa Ackerman | ||
| style="border-style: solid; border-width: 1px"| | | style="border-style: solid; border-width: 1px"| 194 cm / 68 kg / R | ||
| style="border-style: solid; border-width: 1px"| | | style="border-style: solid; border-width: 1px"| - | ||
| style="border-style: solid; border-width: 1px"| | | style="border-style: solid; border-width: 1px"| - | ||
| style="border-style: solid; border-width: 1px"| | | style="border-style: solid; border-width: 1px"| 27, 85 | ||
|- | |- | ||
| style="border-style: solid; border-width: 1px"| CB | | style="border-style: solid; border-width: 1px"| CB | ||
| style="border-style: solid; border-width: 1px"| | | style="border-style: solid; border-width: 1px"| ~ Uguu ~ | ||
| style="border-style: solid; border-width: 1px"| | | style="border-style: solid; border-width: 1px"| 187 cm / 41 kg / R | ||
| style="border-style: solid; border-width: 1px"| - | | style="border-style: solid; border-width: 1px"| - | ||
| style="border-style: solid; border-width: 1px"| - | | style="border-style: solid; border-width: 1px"| - | ||
| style="border-style: solid; border-width: 1px"| 25 | | style="border-style: solid; border-width: 1px"| 25 | ||
| Line 146: | Line 132: | ||
| style="border-style: solid; border-width: 1px"| RB | | style="border-style: solid; border-width: 1px"| RB | ||
| style="border-style: solid; border-width: 1px"| Kudryavka Noumi | | style="border-style: solid; border-width: 1px"| Kudryavka Noumi | ||
| style="border-style: solid; border-width: 1px"| | | style="border-style: solid; border-width: 1px"| 182 cm / 37 kg / R | ||
| style="border-style: solid; border-width: 1px"| - | | style="border-style: solid; border-width: 1px"| - | ||
| style="border-style: solid; border-width: 1px"| P06 | |||
| style="border-style: solid; border-width: 1px"| 82 | | style="border-style: solid; border-width: 1px"| 82 | ||
|- | |- | ||
| style="border-style: solid; border-width: 1px"| | | style="border-style: solid; border-width: 1px"| RB | ||
| style="border-style: solid; border-width: 1px"| Pleinair | | style="border-style: solid; border-width: 1px"| Pleinair | ||
| style="border-style: solid; border-width: 1px"| 182 cm / | | style="border-style: solid; border-width: 1px"| 182 cm / 30 kg / R | ||
| style="border-style: solid; border-width: 1px"| | | style="border-style: solid; border-width: 1px"| Defensive Full-back | ||
| style="border-style: solid; border-width: 1px"| | | style="border-style: solid; border-width: 1px"| - | ||
| style="border-style: solid; border-width: 1px"| 101 | | style="border-style: solid; border-width: 1px"| 101 | ||
|- | |||
| style="border-style: solid; border-width: 1px"| DMF | |||
| style="border-style: solid; border-width: 1px"| Rei Q | |||
| style="border-style: solid; border-width: 1px"| 180 cm / 45 kg / L | |||
| style="border-style: solid; border-width: 1px"| - | |||
| style="border-style: solid; border-width: 1px"| - | |||
| style="border-style: solid; border-width: 1px"| 83 | |||
|- | |||
| style="border-style: solid; border-width: 1px"| DMF | |||
| style="border-style: solid; border-width: 1px"| Korbo | |||
| style="border-style: solid; border-width: 1px"| 177 cm / 43 kg / L | |||
| style="border-style: solid; border-width: 1px"| - | |||
| style="border-style: solid; border-width: 1px"| - | |||
| style="border-style: solid; border-width: 1px"| 67 | |||
|- | |- | ||
| style="border-style: solid; border-width: 1px"| DMF | | style="border-style: solid; border-width: 1px"| DMF | ||
| style="border-style: solid; border-width: 1px"| Momiji Inubashiri | | style="border-style: solid; border-width: 1px"| Momiji Inubashiri | ||
| style="border-style: solid; border-width: 1px"| | | style="border-style: solid; border-width: 1px"| 177 cm / 56kg / R | ||
| style="border-style: solid; border-width: 1px"| | | style="border-style: solid; border-width: 1px"| - | ||
| style="border-style: solid; border-width: 1px"| - | | style="border-style: solid; border-width: 1px"| - | ||
| style="border-style: solid; border-width: 1px"| 91 | | style="border-style: solid; border-width: 1px"| 91 | ||
|- | |- | ||
| style="border-style: solid; border-width: 1px"| | | style="border-style: solid; border-width: 1px"| AMF | ||
| style="border-style: solid; border-width: 1px"| Shinobu Oshino | | style="border-style: solid; border-width: 1px"| Shinobu Oshino | ||
| style="border-style: solid; border-width: 1px"| | | style="border-style: solid; border-width: 1px"| 175 cm / 60 kg / R | ||
| style="border-style: solid; border-width: 1px"| | | style="border-style: solid; border-width: 1px"| Classic No. 10 | ||
| style="border-style: solid; border-width: 1px"| | | style="border-style: solid; border-width: 1px"| P05, S11 | ||
| style="border-style: solid; border-width: 1px"| 85 | | style="border-style: solid; border-width: 1px"| 85 | ||
|} | |} | ||
Revision as of 23:44, 7 February 2014
The roster for /c/.
Player Data
| Position | Player | Height / Weight / Foot | Playing Style | Skill Cards | Celebrations |
|---|---|---|---|---|---|
| GK | Ika-chan | 186 cm / 125 kg / L | - | - | 87 |
| LB | Hanako Ikezawa | 185 cm / 52 kg / L | - | P06 | 98 |
| CB | Haruhi Suzumiya | 195 cm / 44 kg / L | - | - | 101 |
| CB | Maka Albarn | 200 cm / 55 kg / R | - | - | 91 |
| RB | Kyouko Toshinou | 185 cm / 45 kg / R | - | P06 | 87 |
| DMF | Konata Izumi | 180 cm / 40 kg / L | - | - | 85, 30 |
| DMF | Miku Hatsune | 185 cm / 42 kg / R | - | - | 86, 59 |
| LMF | Yotsuba Koiwai | 170 cm / 30 kg / L | Box to Box | P04, P05, S12 | 50, 83 |
| RMF | Kirino Kousaka | 170 cm / 45 kg / R | Hole Player | P04, P05, S12 | 80, 86 |
| SS | Yui Hirasawa | 167 cm / 50 kg / R | Dummy Runner | P03, S02, S05, S10, S19 | 81, 81 |
| SS | Sayaka Miki | 192 cm / 50 kg / L | Creative Playmaker | P07, S06, S07, S09 | 87, 101 |
| GK | Miho Nishizumi | 180 cm / 50 kg / L | - | - | 73 |
| LB | Saber | 182 cm / 42 kg / L | - | P06 | 59 |
| LB | Yukko Aioi | 182 cm / 45 kg / L | Defensive Full-back | - | 50 |
| CB | Yuno | 187 cm / 40 kg / L | - | - | 30 |
| CB | Mikasa Ackerman | 194 cm / 68 kg / R | - | - | 27, 85 |
| CB | ~ Uguu ~ | 187 cm / 41 kg / R | - | - | 25 |
| RB | Kudryavka Noumi | 182 cm / 37 kg / R | - | P06 | 82 |
| RB | Pleinair | 182 cm / 30 kg / R | Defensive Full-back | - | 101 |
| DMF | Rei Q | 180 cm / 45 kg / L | - | - | 83 |
| DMF | Korbo | 177 cm / 43 kg / L | - | - | 67 |
| DMF | Momiji Inubashiri | 177 cm / 56kg / R | - | - | 91 |
| AMF | Shinobu Oshino | 175 cm / 60 kg / R | Classic No. 10 | P05, S11 | 85 |
| Name | Number | Position | Image | Description |
|---|---|---|---|---|
| STARTERS | ||||
| Ika-chan | 1 | GK | 
|
Said to come from the sea, she constantly dreams of conquering the surface world as payback for humans polluting the ocean. Keeps the ball cleared with her gripping tentacles. |
| Sayaka Miki | 4 | LB | 
|
Sayaka is a magical girl who is always determined to do what's right. Her transformation has turned her into a fearsome athlete who will be hard to stop on the field. |
| Kirino Kousaka | 3 | CB | 
|
Overachiever with a perfectionist attitude. Looks up to her older brother a bit too much. Recently winning the OreImo bowl has really spurred her on, and she is more dangerous than ever. |
| ~ Uguu ~ | 6 | CB | 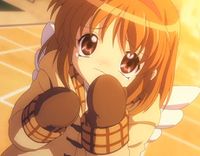
|
Ayu Tsukimiya is a defender with a seemingly limited vocabulary. Fans constantly cheer her on with the only word she seems to know, "UGUUUU ~ ~" |
| Yukko Aioi | 2 | RB | 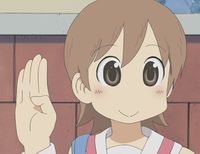
|
An energetic high school girl and a key player in the defence of /c/. Often critisised for stopping in the middle of the field with CUHRAZEY reactions to what's happening. |
| Haruhi Suzumiya | 8 | DMF | 
|
Possesses god-like abilities to change, destroy, and reshape reality, which will surely come in handy on the field. |
| Hanako Ikezawa | 5 | DMF | 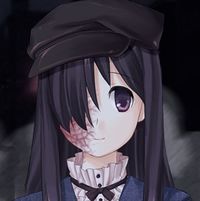
|
A relatively new recruit, Hanako is by far the shyest player in the team. Is known to freeze under pressure, leaving the manager no choice other than to lead her off the field. |
| Yui Hirasawa | 10 | CMF | 
|
Though a great player, she can only seem to focus on one thing at a time. Plays for a band as lead guitarist and vocalist during her spare time. |
| Miku Hatsune | 9 | AMF | 
|
PO PI PO PI PO PO PI EEEEEEEEEEEEEEEEEEEEEEEEEEEEEEEEE |
| Yotsuba Koiwai | 11 | AMF | 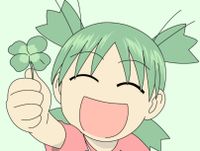
|
Fan favourite with all of 4chan, Yotsuba is determined to make her daddy proud by scoring for /c/. |
| Konata Izumi (Captain) | 7 | CF | 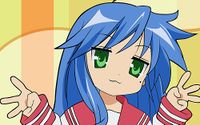
|
Eccentric and outgoing, albeit lazy, she won't let her sedentary lifestyle get in the way of scoring goals. |
| SUBSTITUTES | ||||
| Miho Nishizumi | 29 | GK | 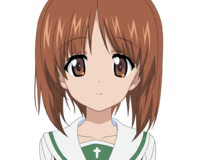
|
Tank operator and high school student, Miho uses her experience to stop all incoming shots on target. |
| Hinata Hyuuga | 38 | GK | 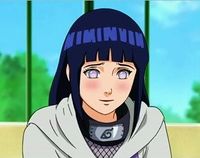
|
Can see incoming shots from seemingly everywhere. Has a rabid fanbase which damages her reputation to some. |
| Chiyo Mihama | 22 | LB | 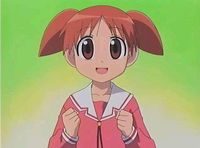
|
One of the smallest members of the team. Said to be absolutely terrible at sports, she's now determined to prove that statement wrong. |
| Kyouko Toshinou | 19 | LB | 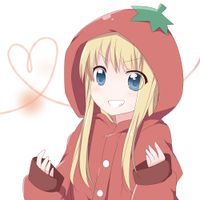
|
Despite some laziness off the pitch, she's a very active member of the defence whenever she's on it. There are some rumours she is familiar with Akkarin of /u/ fame. |
| Nanami Madobe | 14 | CB | 
|
Known for advertising operating systems, she has now taken to the field to spread her message. |
| Maka Albarn | 81 | CB | 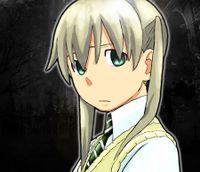
|
Taking a break from her Meister duties, and from indoors, she brings determination, enthusiasm, and some wicked tackles to the pitch. |
| Mikasa Ackerman | 45 | CB | 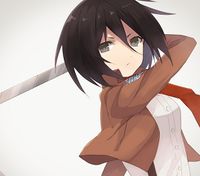
|
A real titan in /c/'s defense. She is a fighter who is determined to not let anyone through to score. |
| Saber | 15 | RB | 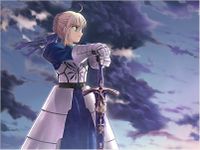
|
Has sworn upon her honour to do all she can to protect the goal from the evils of the other team, but will only do so with the utmost fairness. |
| Pleinair | 32 | RB | 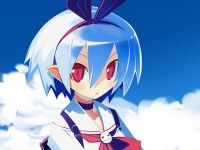
|
Signed not only to represent herself but video game characters in general, she's fully prepared to Usagi Drop the other team. |
| Rei Q | 17 | DMF | 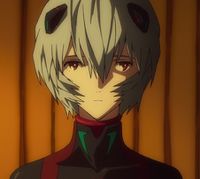
|
A controversial player, many people have questioned her existence and she is always a hot topic on /c/. Nevertheless, she will try to do her best for the few fans she has. |
| Momiji Inubashiri | 16 | DMF | 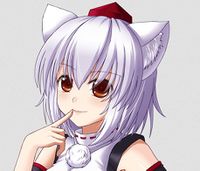
|
Representing all touhous of /c/, Momiji is determined to prove herself before all of Gensokyo and the 4chan Cup. |
| Shinobu Oshino | 18 | DMF | 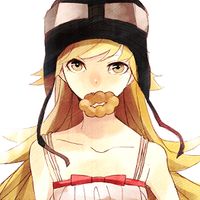
|
With an age that belies her level of experience, she'll be a bloody nightmare for the other team. |
| FORMER PLAYERS | ||||
| Karin Hanazono | - | CF | 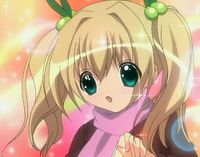
|
Was let go from the team despite of her relatively good performance due to being irrelevant to the board. |
| Madotsuki | - | CB | 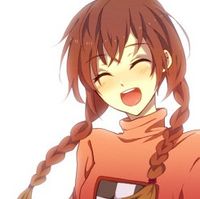
|
Was transferred to /jp/ at the request of /jp/'s management. |
| Dawn | - | GK | 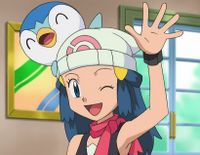
|
Coming from the lands of /vp/, she is determined to "Catch em' All". A very good friend of former /vp/ goalkeeper Ash "Ass Man" Ketchum.
After getting seemingly no playtime at all under /c/'s new management, Dawn decided her days in /c/ were over and left the team. Will she be playing for /vp/ in the future? Time will tell. |
| Haruka Amami | - | CB | 
|
Known as the "Idol" of the field, she is also a talented singer. She often receives allegations for diving during matches.
Put her boots on the shelf to keep working on her singing career, since her playtime was limited. Now performs /c/'s anthem together with the 765 Pro Allstars. |
| Nia Teppelin | - | CB | 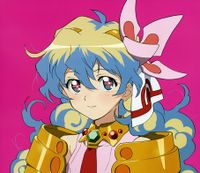
|
Don't let Nia's timid appearance fool you, she is ruthless in the defence of /c/.
Had to make room for new blood and is no longer on the team. |
| Sailor Moon | - | LMF | 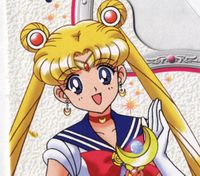
|
The veteran decided that her days of playing football were over and retired from /c/. |
| Moetron | - | LMF | 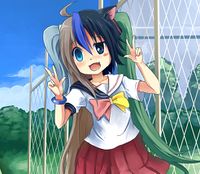
|
Moetron was deemed irrelevant to the board, and therefore sacked. |
| Tomoko Kuroki | - | RMF | 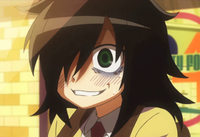
|
Tomoko decided that she wanted a second chance in her former team /a/ after her relatively successful friendlies tour of /c/. |
| Yuno | - | LB | 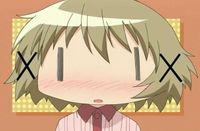
|
Yuno felt that her job of kicking a ball around a field didn't fulfil her artistic aspirations. Decided to leave the team to attempt a more cultured career path. |
| Buffalo Bell | - | CB | 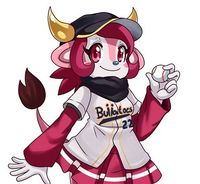
|
Returned to her previous role as a mascot after feeling undervalued on the pitch. |
| Uiharu Kazari | - | RB | 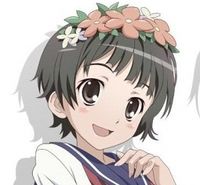
|
After some controversy around her relationship to Saten of /jp/, retired completely voluntarily from the team. |
| Kawaii Means Cute | - | RB | 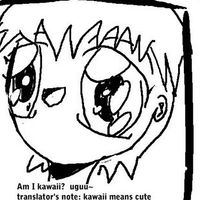
|
Taking a hard shot to the eye when blocking a free kick put an end to the promising career of this player. |
| Beako | - | CMF | 
|
このロリコンどもめ!! |