Difference between revisions of "Pro Evolution Soccer 2015/Boots"
m |
m |
||
| Line 28: | Line 28: | ||
[[File:Boots Full.png|1000px]] | [[File:Boots Full.png|1000px]] | ||
Now all you need to do to complete your design is add the transparency holes. If you left the original image in a different layer, then this step is incredibly easy. As you can see below, just bring up that original layer, use the magic wand tool on all transparent areas then bring the layer with your design back up and hit delete. | |||
[[File:Boots Delete.png|1000px]] | |||
Remove any unneeded layers and save your file as a .png. Your design for the in-game shoe is complete. | |||
You now need to transfer your design over into the ek0042_c file, which is a case of copy and pasting your design from k0042_c over and fitting it to the correct dimensions. | |||
Revision as of 20:27, 15 March 2015
| ||||||||||
Introduction
This page will explain how custom boots can be created and imported into PES15. Due to the fact that there is no page on the wiki explaining how custom boots are created, we will start off with that process. Currently, only 2 teams have boots, being /mlp/ and /gd/, so we can use this page to select allocations to the in game boots if the head of aesthetics Test Pony allows it.
Creating Boot Textures
Firstly, you will want to download a generic boot folder to begin your design on.
You can download this here.
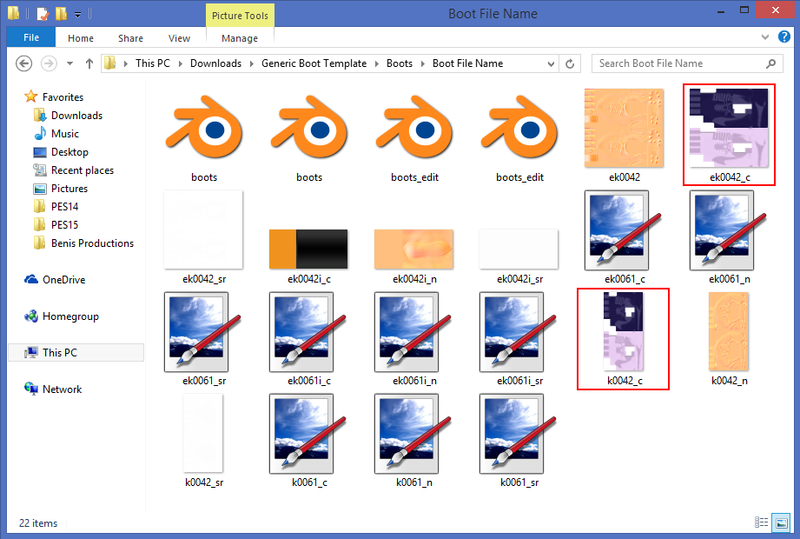
When you extract this .rar and open the folder, you will find these files below:

The only files you will need to touch are 'k0042_c' and 'ek0042_c'. k0042_c is the texture for the boot in game, whereas ek0042_c is the texture for the boot preview. ek0042_c is simply a squashed down version of k0042_c, so you will only need to texture k0042_c. When you are finished, you can then copy and paste your k0042_c design over to ek0042_c and transform it into the correct dimensions, so we will worry about that later when the time comes.
Getting Started
To begin, open up the file k0042_c. Unless you plan on having asymmetrical boots like /mlp/, just focus on one boot for now. You can copy and paste it over later.
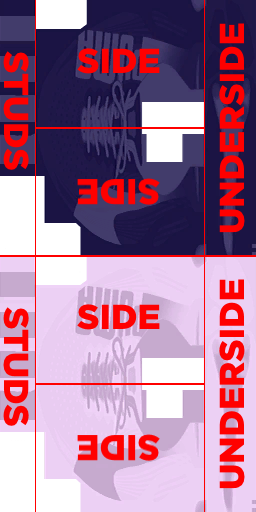
Below here is a diagram with all the different sections of the boot.
As you can see, there are certain parts of the image that are transparent. These parts are important, so you will want to start designing your boot on a different layer so you can go back to original image and use these transparent parts later. Since this is the case, don't be afraid to design over these transparent gaps in the meantime since we will edit them out in the end.
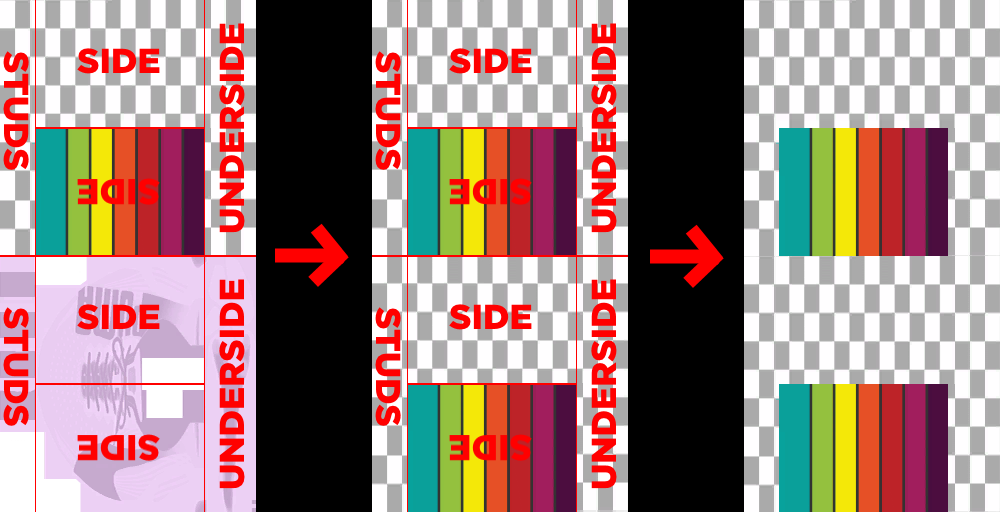
Once you have finished your design, copy and paste your boot over so you have two boots. Your image should now look like the one below, with your own design of course.
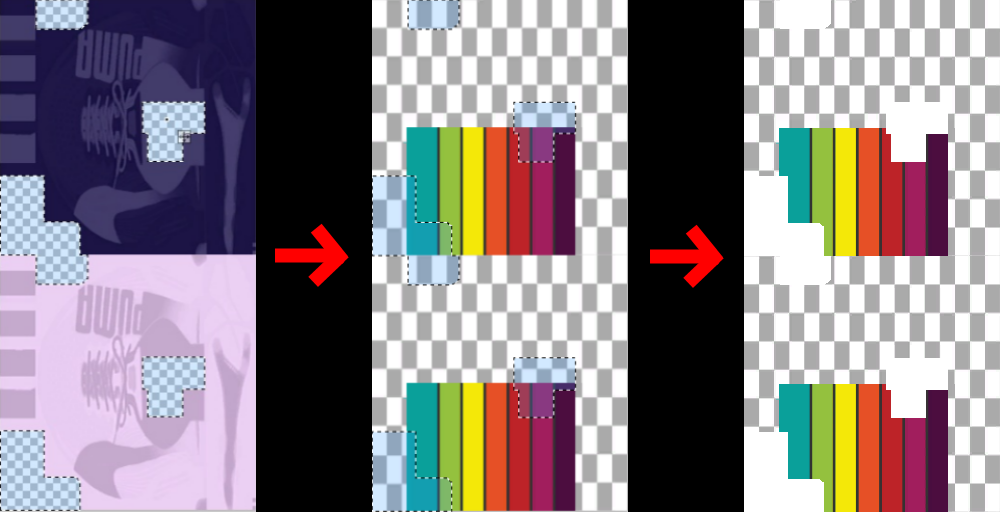
Now all you need to do to complete your design is add the transparency holes. If you left the original image in a different layer, then this step is incredibly easy. As you can see below, just bring up that original layer, use the magic wand tool on all transparent areas then bring the layer with your design back up and hit delete.
Remove any unneeded layers and save your file as a .png. Your design for the in-game shoe is complete.
You now need to transfer your design over into the ek0042_c file, which is a case of copy and pasting your design from k0042_c over and fitting it to the correct dimensions.


