Pro Evolution Soccer 2018/Kits

|
The content of this page or section is incomplete because we're a bunch of lazy fucks. Feel free to help out. |
Pro Evolution Soccer 2021 This is still a work in progress. Please be patient. | |
|---|---|
| Game | |
| Rules | |
| Info | |
| Tools | |
| Modding | |
All in a work in progress.
Introduction
Hopefully, this page will try to explain how to make, edit and convert kits from PES17 and how to set them up in PES18 and beyond. Kit files,sizes,format and configs are all different in PES18, so this may take some time.
Vintage Kits
Vintage Kit Textures
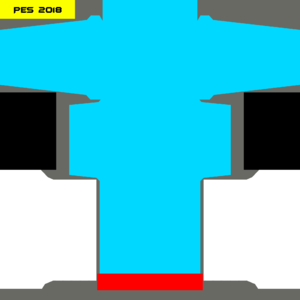
The main kit texture is a 2048x2048 FTEX file. It is advised to get a more extensive image editing program to make these kit textures. You can also just use the converter below in the tools section. Just remember to resize and edit your kit template to the new dimensions. A PES18 kit template is given below to give you an idea where everything is. Please note the changes in size with the socks and shorts. You can also check out some existing kit textures in the provided example file also found in the tools section via root\Asset\model\character\uniform\texture\#windx11 with Jenkey's File Explorer. You can also search online for examples.
Porting PES17 kits to PES18
Proper Method
You'll need: Ftextool, something that can edit and save .dds files, a CPK builder (CPFM), patience
- Get all your unzlibbed kit files.
- _name, _back, _chest and _leg work as they are, no editing should be required.
- The main kit file now uses an alpha layer, black for the regular material, white for the shiny parts on the mask file. Always create at least a black alpha channel if you don't want your kits to look shinier than the Fallout 76 Leather Jacket.
- Save your kit .dds under DXT5 and generate MIP maps.
- _mask works differently now. The shinies use a #1ee700 color, while the backdrop is #898200, so repaint your mask and save as DXT1 (generate MIP maps) with a _srm suffix instead of _mask.
- Now take ftextool, convert all those files into .ftex and stick them into Asset\model\character\uniform\texture\#windx11 and make yourself a .cpk. Please refer to the old ass PES 16 DLC/CPK guide if you need help doing that, it still works the same.
- Your kits are ready, but you still need to setup your kit configs for them to show up.
Kit Config Setup
You'll need: Kit Manager, uniformparameterbuilder, a CPK builder, knowing what kit configs are and how they work
Kit configs work the same, but getting them into the game is now one step more complicated. PES 18 needs a UniformParameter.bin file alongside all the individual kit config .bins. To replace a single kit config file, you need to:
- Be a hex-editing pro who can just hack into the mainframe system, or...
- Get the 4CC uniformparameter.bin by unpacking it from the 4CC .cpk (currently 4cc_db.cpk, or if the individual file is somewhere for download I dunno) under common\character0\model\character\uniform\team\
- Use the uniformparameterbuilder to extract individual .bin files.
- This generates a team folder with all the teams and their .bins, keep that folder safe because you'll be using it everytime.
- Replace the placeholder .bin configs in the folder with your custom ones - they should still work the same, so a drag and drop of old PES17 configs should do it (feel free to delete the unused placeholder ones, too).
- Drag the whole team folder to Pack individual .bin files in the uniformparameterbuilder.
- Put the team folder with the newly created UniformParameter.bin back into common\character0\model\character\uniform\ and pack it snuggly into a .cpk again.
- Test it out and hope it works.
- If your kits still show up white, you probably either misplaced or wrongly named some of your configs or textures. If they don't load/crash the game, your textures are most likely saved in the wrong format.
- Bonus round: You can also put the PES17 UniColor.bin in there next to the UniformParameter.bin and it just werks.
Custom Kit Models
These are made by creating a Full Body Model (FBM) and setting it on a Boots slot, then using its boot ID on every player you want to give the kit to.
You first need to set FPC on each of those players to remove their default body.
Check the following for more details:
Making FBMs and Porting FBMs to 18/19
FPC Info
Pes Master Kit Preview
PES Master is a website that allows you to make simpler kits with simple designs online to be converted to PNG files. You can also use the website to view what custom made kits would look like without having to load in into the game. The website can be found HERE. Open the website and click Settings, then Preview Mode. Make sure it's a PNG 2048x2048 file.
Tools
- PES18 Kit Template: The socks and short haves changed to a smaller size from pes17, so all kits will need to be remade, otherwise logos and certain patterns will look abstract and wonky
- The Mauledidas Super Kit Template from PES14-17 is still fully-functional with only minor tweaks required upon completing a kit.
- PES 2018 FtexTool v0.2: Helps convert DDS files to and from FTEX files.
- Kit Studio 2018: Helps organize and edit bin files
- Uniform Parameter Builder V1.1.7" Helps export and organise team files for kit studio to edit
- Example CPK Pathing for kits: Example of finished cpk for a kit to be added to the game


